
Barcode software for non-technical staff using Excel data
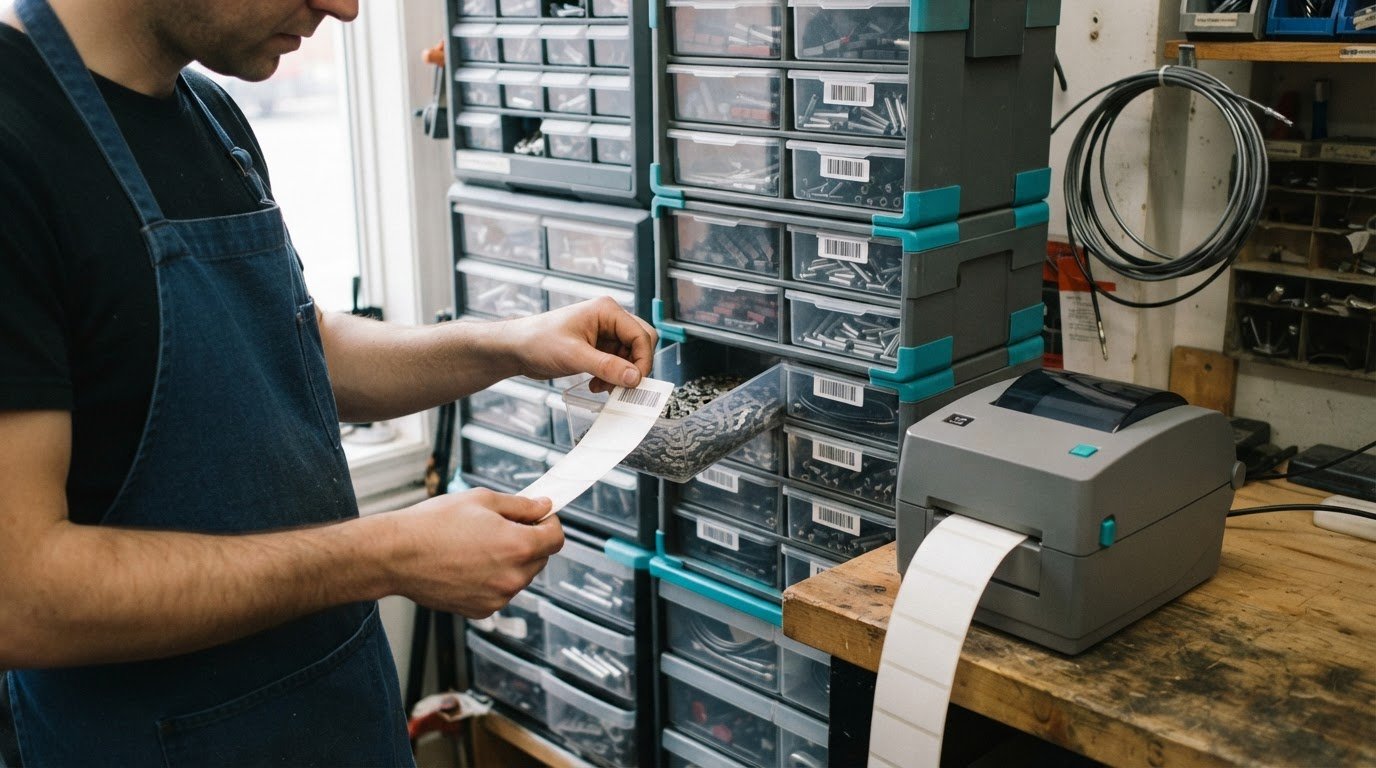
Excel can supply the data, but barcode software handles the step from spreadsheet rows to printable labels. Easy-to-use barcode software for non-technical staff lets users create barcode labels from Excel data and work with Word files or databases, without building each label by hand. The key is a clear workflow for connecting data, arranging the label and preparing it to print.
If you already manage product, inventory or asset details in a spreadsheet, you shouldn't have to rebuild that information to make labels. Barcode software can connect your data to a label layout, helping you create labels from records you already use.
This article explains what barcode software does, how it works with Word, Excel and databases, and what to assess during a trial. You'll also learn how to judge whether a workflow is practical for non-technical staff, from choosing data fields to previewing labels and testing a print before producing a batch.
Key Takeaways
- Use Excel or Word data to build barcode labels, and keep label proportions intact when resizing.
- Connect a database when labels need to reflect changing records, and focus on how fields map to the label.
- Assess whether staff can follow the label-making workflow without relying on technical support for routine tasks.
- Use a software trial to test data import, label previews and printing with your actual workflow.
- For a small-business inventory setup, match the software and printing equipment to how you identify and track items.
Barcode creation in Microsoft Word and Excel
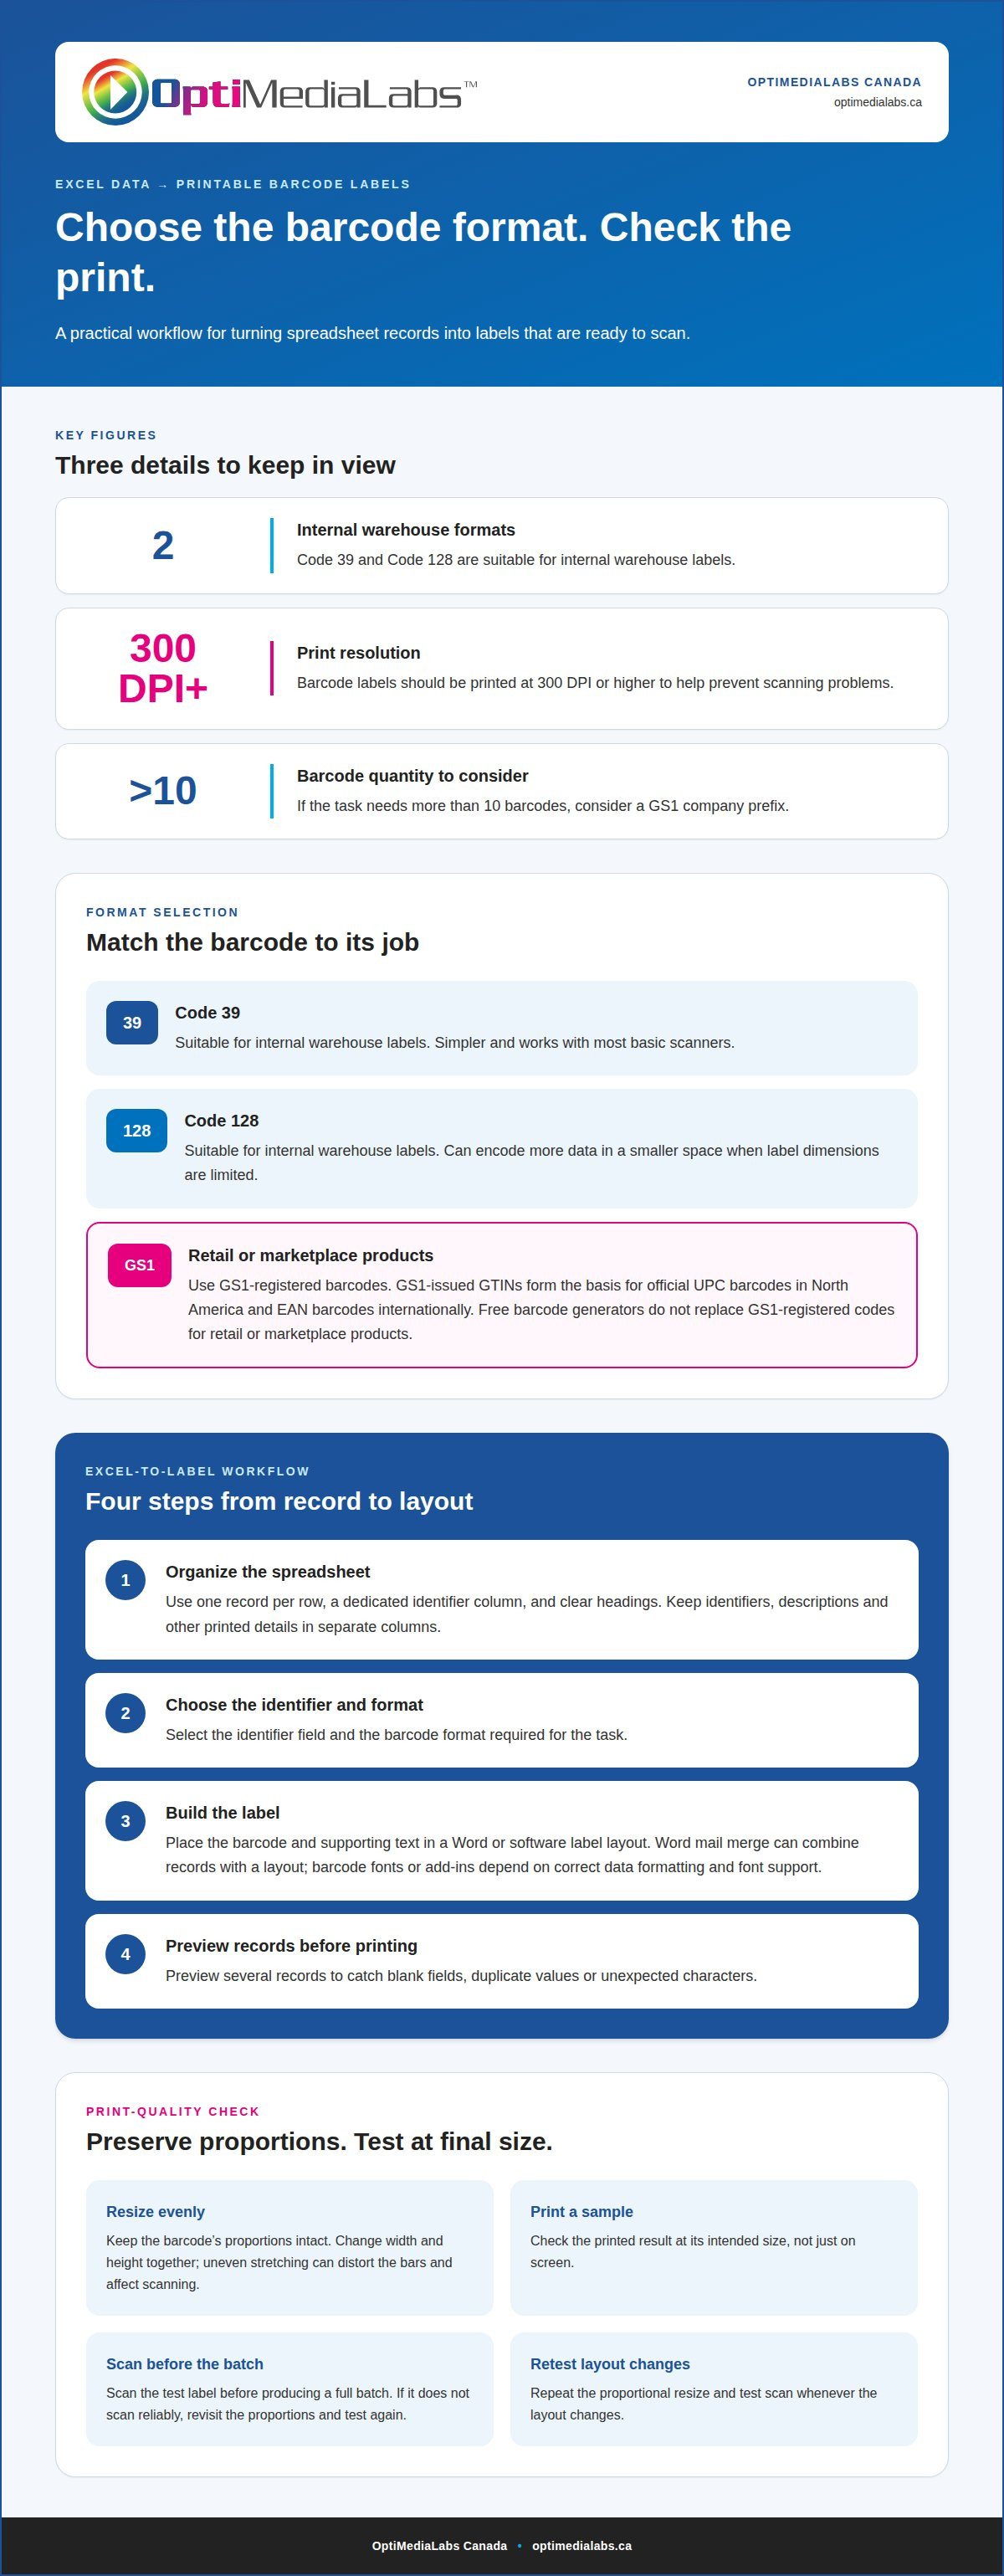
Excel can organize label data before you generate barcodes. Set up one row per item, with separate columns for identifiers, descriptions and other printed details. For example, an inventory sheet might have an item code in one column and a product name in another. Clear headings make it easier to map each spreadsheet field to the right place on a label.
Word can combine records with a label layout through a mail merge. A barcode font or add-in may create a barcode from a field, but the result depends on correct data formatting and font support. Professional barcode software can instead connect the data to a barcode object, then place accompanying text beside it. A platform that supports Excel and Word workflows can help staff use familiar files while managing barcode settings in one place. Barcode and label design software is one example of this software category.
Choose the barcode format based on how the label will be used. Code 39 and Code 128 are suitable for internal warehouse labels. Code 39 is simpler and works with most basic scanners. Code 128 can encode more data in a smaller space, which can help when label dimensions are limited. For products sold through retailers or marketplaces, use GS1-registered barcodes. GS1-issued GTINs form the basis for official UPC barcodes in North America and EAN barcodes internationally.
- Arrange the Excel data with one record per row and a dedicated identifier column.
- Select the identifier field and the barcode format required for the task.
- Place the barcode and any supporting text in the Word or software label layout.
- Preview several records to catch blank fields, duplicate values or unexpected characters.
If the task needs more than 10 barcodes, consider a GS1 company prefix. Free barcode generators may suit internal labels, but they don’t replace GS1-registered codes for retail or marketplace products. This distinction matters before printing, because the barcode’s purpose determines its source and format.
Keep the barcode’s proportions intact when resizing it. Stretching it unevenly can distort the bars and affect scanning. Print a test label and scan it before producing a full batch. For print quality, barcode labels should be printed at 300 DPI or higher to help prevent scanning problems. Check the printed result at its final size, not just on screen.
Keep the barcode’s proportions consistent as you adjust the label layout. Change its width and height together instead of compressing or stretching it in one direction. Once you set the dimensions, print a sample at the intended size and scan it before producing the batch. If it doesn’t scan reliably, revisit the proportions and test again. This gives you a practical decision point rather than relying on how the barcode looks on screen. Repeat the proportional resizing and test scan whenever the layout changes, so you assess the barcode as it will actually be used.
Database connectivity and dynamic data
A database connection lets barcode software use records stored outside a label file. For example, an inventory database might hold item identifiers, descriptions, locations and stock details. The software maps selected fields to a label layout, so each label can display information from its matching record. This suits workflows where staff update records centrally instead of editing separate label files.
Dynamic data means label content changes when the selected record changes. A warehouse worker could choose an item record and generate a label showing its identifier and storage location. The barcode can encode the identifier, while readable text displays the location. This ties printed information to the selected record and reduces repeated data entry.
Before setting up a connection, identify where the records are stored and which fields the labels need. A database may contain columns that don’t belong on a label. For example, a staff note can stay in the record while the label uses only an item code and description. Clear field names make mapping easier to understand and maintain.
Use a structured setup process:
- Choose the database or data source containing the required records.
- Map each label element to its matching field, such as item code or location.
- Select the records to print using available search or selection controls.
- Preview a sample record and confirm the barcode and text match its data.
- Print a test label, then scan it using the intended workflow.
Record selection matters. A print job should include the intended items, not every database entry by default. Search terms, filters or selected records can narrow the job. For example, staff preparing shelf labels may need records for one aisle, while a receiving task may use recently added inventory. Choose selection controls that fit how your records are organized.
Plan for data changes. If a product description or location is updated, a newly generated label should use the current record value. Previously printed labels won’t update automatically, so teams need a process for replacing them when relevant fields change. Keep the source of truth clear, especially when several staff members update records.
Printers are the final part of this workflow. Match the layout to the printer’s media, then confirm the barcode scans from a test print. Database-based labelling also depends on reliable field mapping and a clear record-selection process. To discuss barcode workflow requirements, contact OptiMediaLabs Canada.
Ease of use for non-technical staff
For non-technical staff, an intuitive workflow matters more than a long feature list. A clear interface should guide users from choosing a data source to selecting a label layout and starting a print job. An inventory clerk, for example, should be able to find an item, preview its label and spot missing information without manually editing barcode settings.
Look for guided setup tools that explain choices in plain language. Professional label software can include pre-built wizards for meeting GS1 requirements for grocery retail and GHS standards for chemical safety. These workflows help users select relevant fields and organize required label elements. They also reduce the need to begin with a blank design, especially for common retail or chemical labelling tasks.
Barcode terminology can make setup harder than necessary. Users shouldn’t have to understand every symbology before creating a label. Professional software supports many barcode types, so practical controls should help staff choose a format for the label’s purpose. A warehouse label and a grocery product label, for example, may need different formats and data.
Assess the interface with everyday staff tasks, not just a prepared demonstration. Ask a user to open a template, choose a record, adjust a text field and preview the result. Check whether the screen explains errors, such as a blank identifier, invalid data or text that doesn’t fit. Clear prompts help staff fix the input instead of guessing at the cause.
- Templates: Check whether staff can select a suitable layout without building one from scratch.
- Field names: Confirm that labels such as “Item code” and “Location” are recognizable.
- Preview: Make sure users can review the barcode and readable text before printing.
- Error messages: Look for specific guidance when a required value is missing.
Consider how the software handles different roles. Staff who print routine labels may need fewer controls than the person managing templates. Separating everyday print tasks from layout changes can help prevent accidental edits. For example, a warehouse operator could select a saved template and print a chosen record, while a supervisor maintains the approved layout.
Use a representative task to judge the learning curve. Have a new user create a sample label from a familiar item record, then repeat the task without step-by-step help. Include a barcode preview and a test scan. Software that supports 2026 GS1 standards can also be relevant when grocery retail labels are part of the workflow. The best fit makes routine work clear while keeping advanced configuration available when needed.
Software trial and sales options
A software trial is most useful when it follows a real label task. Choose something staff handle regularly, such as making an item label from a spreadsheet record. Use the same data, label dimensions and printer setup planned for routine work. This can reveal workflow issues that a sample template won’t show.
Start by identifying what users can test during the trial. Focus on features your workflow depends on rather than exploring every menu. For example, assess whether staff can import data, select the right records, create a layout and prepare a print job. Trial access and included functions vary by software, so review the terms before relying on a feature.
Give the trial to the people who will use the software day to day. A technically confident administrator may find setup easy, while a warehouse employee may need clearer prompts. Ask a staff member to complete a task without step-by-step coaching. Note where they pause, choose the wrong field or need help understanding an error message.
Use a short evaluation plan:
- Choose one routine label task and its real data source.
- Have a staff member complete the workflow, from data selection to print preview.
- Check the label content, barcode appearance and available print settings.
- Print and scan a sample using the intended printer and scanner.
- Record which steps were clear and which required administrator support.
Assess the full workflow, not just the design screen. A label that looks right in preview still needs to work with the selected printer, media and scanning process. For example, test a label in the receiving area if receiving staff will use it. This can expose practical issues with data selection or handoff before you adopt a routine process.
When comparing purchase options, match the software arrangement to how the business will use it. Clarify how many staff need access, whether they share templates and who maintains label layouts. Consider the data sources, barcode formats and printing tasks required, too. These needs determine which capabilities matter most. A small team with one workflow may value straightforward repeat printing, while varied departments may need broader controls.
Compare software options using the same task instead of relying on feature lists alone. A trial can show whether staff can repeat the process accurately and an administrator can manage templates. Before choosing, document the required workflows, user roles and printer setup. These criteria help guide the purchase and avoid paying for features that don’t support your actual label process.
Best no-code barcode inventory software for small businesses in Canada
There isn’t one best barcode inventory setup for every Canadian small business. The right choice depends on what the business tracks, how staff record stock movement and whether inventory software is already in use. A retailer managing product quantities has different needs from a workshop tracking tools or a small warehouse handling bins.
Separate inventory tasks from label-making tasks. Inventory software records item details and stock activity; barcode software creates labels that identify those items. Some workflows use both, while others use barcode labels with an existing inventory system. For example, a small parts business might print item identifiers, then record counts in its current system after scanning.
“No-code” should mean staff can configure routine tasks without writing scripts or building custom applications. It doesn’t mean there’s no setup. Someone still needs to define item identifiers, label fields, user roles and the steps for receiving, moving or counting stock. A clear process helps prevent duplicate records and inconsistent item names.
Compare options against the inventory actions staff perform every day:
- Item identification: Can each product or asset use a consistent identifier?
- Stock movement: Can staff record receiving, transfers and counts in the intended workflow?
- Label needs: Do labels need only an identifier, or also a name, location or other details?
- Staff access: Can routine users complete tasks without changing controlled settings?
- Printing: Does the workflow suit the printers, labels and barcode format in use?
Use a real example to assess the fit. For a shop receiving a shipment, trace an item from arrival to shelf placement. Identify where its record is created, when its label is printed and how the stock count changes. If staff need to switch between tools or re-enter the same details, account for that extra work in the decision.
Decide how staff will handle exceptions, too. A damaged label, an unrecognized barcode or a stock-count mismatch needs a clear next step. For example, staff might set aside an unreadable item for correction instead of creating a new record. Consistent exception handling matters because a simple interface can’t resolve unclear inventory procedures.
For Canadian small businesses, assess software using local workflows, existing records and the equipment used at the worksite. Make a short list of essential tasks, then compare how each option supports them. Discuss barcode inventory requirements to identify an appropriate software and printing setup for your operation.
The right fit supports the business’s actual receiving, movement, counting, labelling and printing workflows without custom code. Assess it using a real item workflow, the records already in use and the equipment involved.
OptiMediaLabs Canada
OptiMediaLabs Canada is a next step when your barcode workflow needs printing equipment or related supplies alongside software. Its offerings include Afinia Color Label Printers, RFID Label Printers, Afinia Label Cutters & Finishers and Thermal Transfer Ribbons. These products can support the move from a digital layout to a printed label.
Consider the label type, printing method and materials your workflow requires. A business printing colour product labels, for example, may need different equipment from one producing RFID labels. Matching these requirements to the software workflow helps you assess the complete setup.
For information about relevant products, contact OptiMediaLabs Canada.
Put your barcode workflow into practice
Choosing easy to use barcode software for non-technical staff can make label tasks easier to incorporate into everyday work. Before adopting a workflow, decide who will manage templates, print labels and handle changes to item records. Clear roles help keep routine printing consistent as your business grows.
Consider the complete setup, not just the software. The data source, barcode format, printer and label materials all affect how the workflow fits your operation. OptiMediaLabs Canada offers barcode software and related printing products, including Afinia Color Label Printers and RFID Label Printers. The right combination depends on the equipment and label tasks your business uses.
Use your intended workflow to guide the next decision. If you’re ready to discuss barcode software and related products, contact OptiMediaLabs Canada. A clear plan can help your team move from spreadsheet data to a repeatable labelling process.
Frequently Asked Questions
What barcode software is easiest for non-technical staff to use?
Easy to use barcode software for non-technical staff should make routine label tasks clear, from choosing a record to preparing it for printing. Look for plain-language prompts, useful templates and error messages that explain what needs fixing. For example, a missing item identifier should be easy to spot and correct. Test the workflow with the staff who will use it, not just an administrator.
Which barcode software has the simplest setup and user interface?
There’s no single interface that’s simplest for every team. Setup depends on your data source, label requirements and printer workflow. A small operation printing a consistent item label may need fewer configuration options than one handling several label types. During evaluation, have a staff member complete a routine task independently. Note how easily they find a template, select a record and understand the prompts.
How much does easy-to-use barcode software cost in Canada?
Barcode software pricing varies by product and licensing model, so there isn’t one standard cost for Canadian businesses. The total may depend on the software edition, printer access, user requirements and optional capabilities. Compare licence terms and included functions with your actual workflow. Also account for compatible printers and label supplies when planning the overall budget, since those are separate purchases from the software.
Does barcode software integrate with Shopify, QuickBooks or accounting systems?
Integration with Shopify, QuickBooks or another accounting system depends on the specific software and connection method. Easy to use barcode software for non-technical staff should make required data exchanges understandable, whether through an importable file or a dedicated connector. Identify the fields that need to move between systems, such as item codes or product descriptions, and confirm the software supports the format your team uses.