
E-Commerce Barcode Label Printing Software for Small Businesses
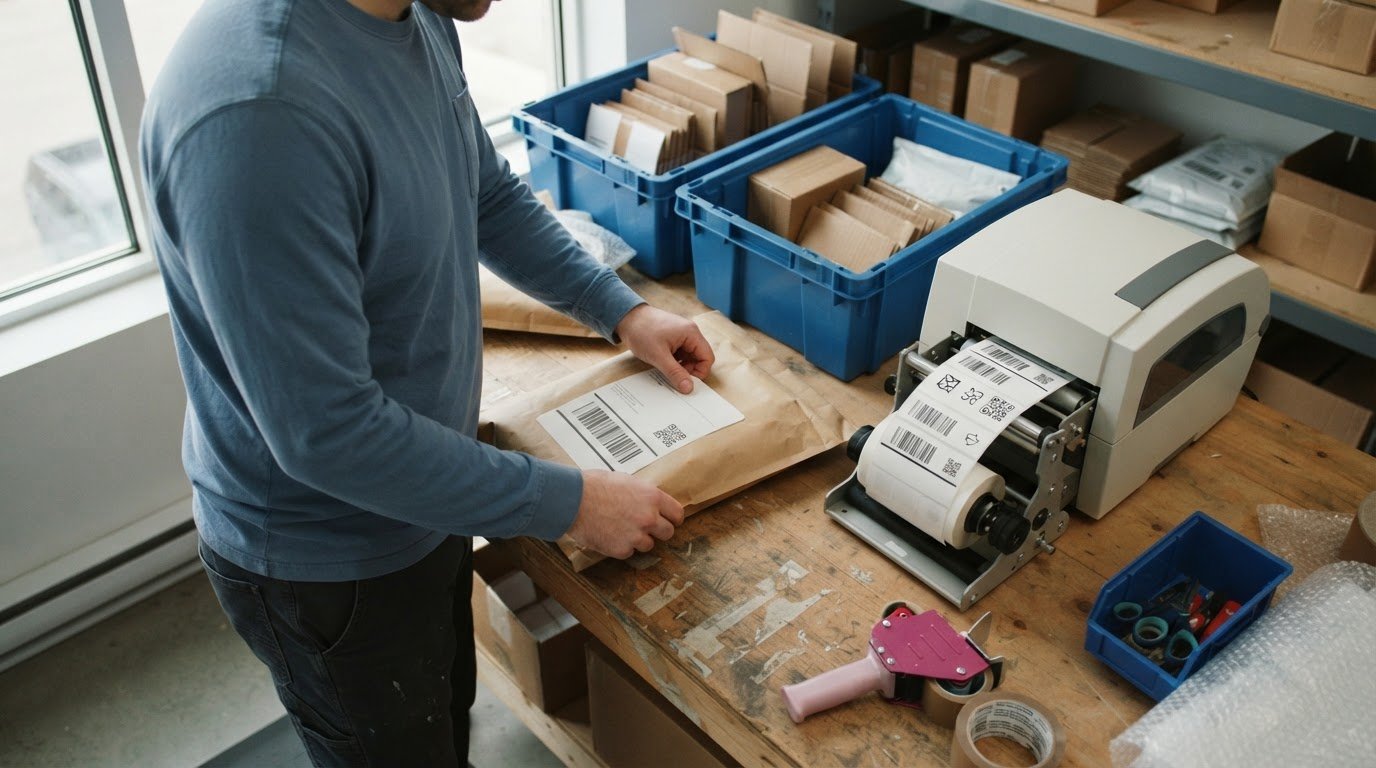
The best fit for a small online business isn’t necessarily the software with the longest feature list. E-commerce barcode label printing software fits when it connects with your store or order data, prints the variable details each parcel or product needs, and supports the label formats and codes you use. If it doesn’t suit your workflow, extra features may add friction instead of removing it.
It’s reasonable to want a clear process for preparing accurate labels without adding unnecessary complexity. The right e-commerce barcode label printing software depends on how you manage orders, which printer you use, and what information each label must display.
This guide explains how to assess that fit. You’ll learn what to look for in store-system connections, variable data, label sizes, barcodes, and QR codes, so you can decide whether the software meets your needs and supports your day-to-day labelling process.
Key Takeaways
- Choose an interface that makes label setup straightforward and reduces the steps involved in routine printing.
- Assess how the software and printer connect with the store systems that manage orders and product information.
- Use spreadsheet or database connections to populate changing product and order details on label templates.
- Match label dimensions and barcode or QR code formats to each label’s purpose and scanning needs.
- Consider Labelview software from OptiMediaLabs Canada when you need software for barcode label production.
Easy-to-use interfaces and label design wizards
A usable interface makes label setup manageable, from selecting a template to printing a test. For a small Canadian seller, the best choice depends on printer compatibility, order volume, and how easily staff can update label fields.
There’s no single best software option for every business. Compare free, desktop, and cloud-based tools by their workflows, printer support, and ability to handle the labels you need.
Barcode label design and printing
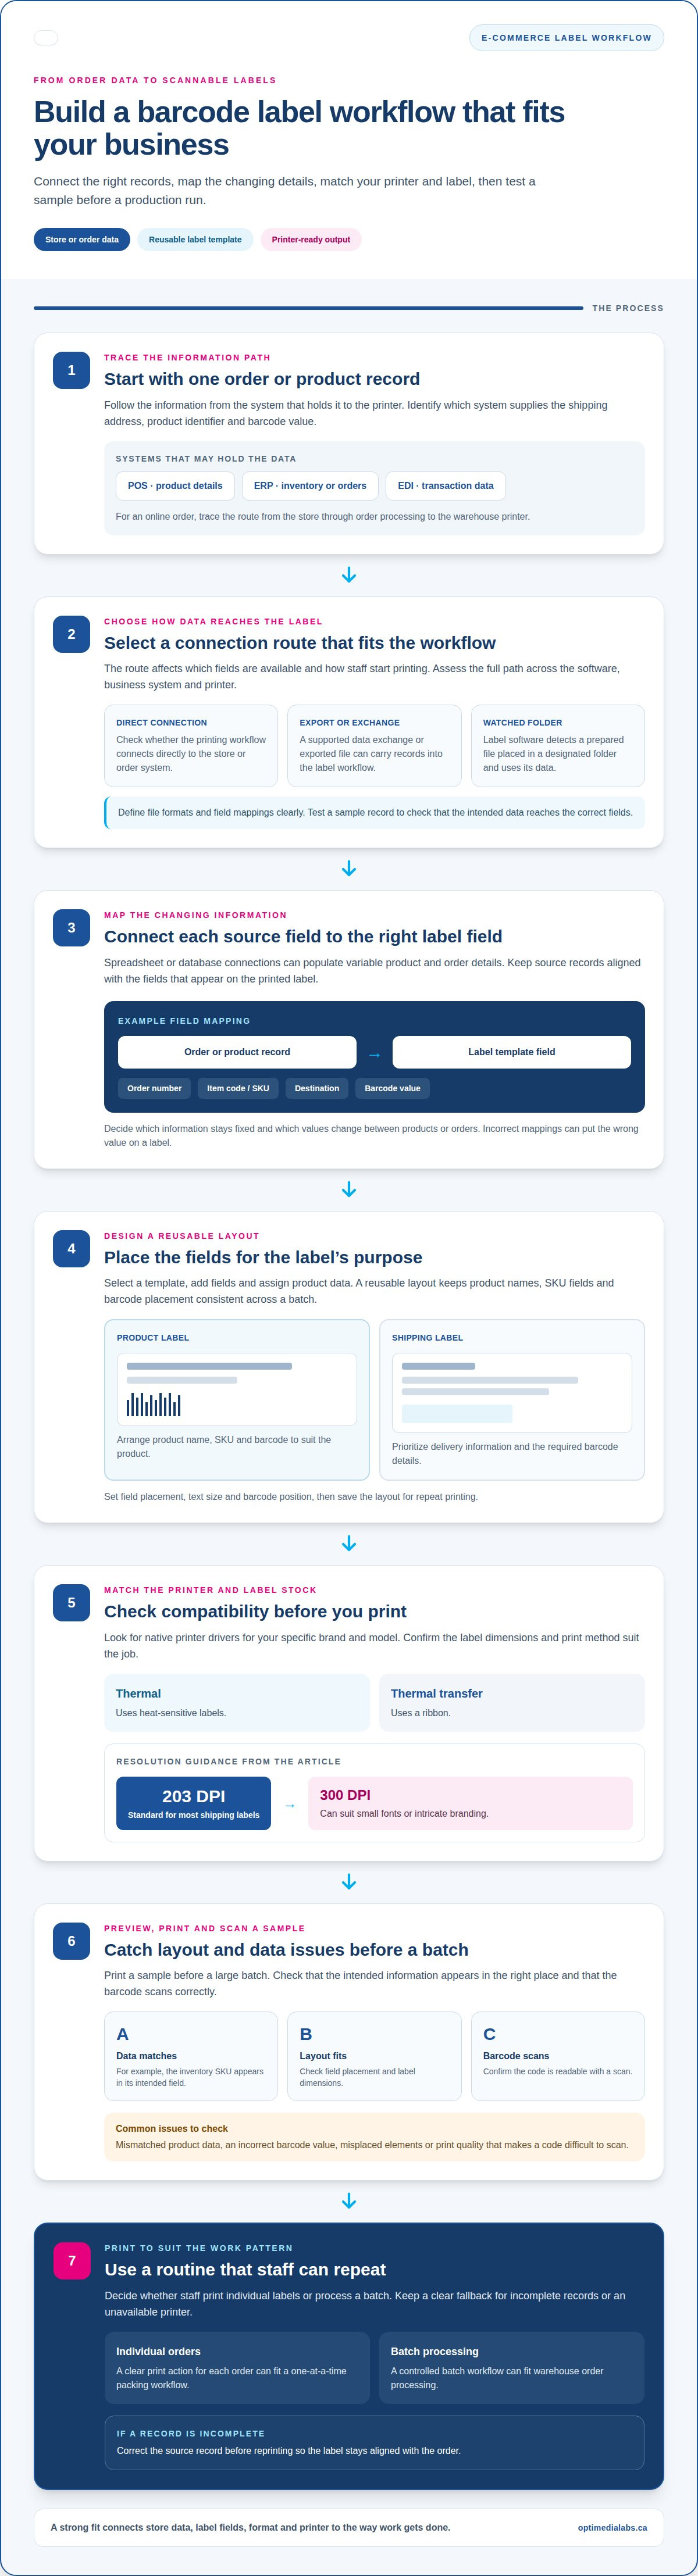
Barcode label design usually involves choosing a layout, adding fields, and assigning product data to each field. A wizard can guide users through these steps, while a reusable template keeps product names, SKU fields, and barcode placement consistent across a batch.
Look for native printer drivers for your specific printer brand and model. Also consider the print method: thermal printers use heat-sensitive labels, while thermal transfer printing uses a ribbon. For most shipping labels, 203 DPI is a standard resolution; 300 DPI can suit small fonts or intricate branding.
Before printing a large batch, print a sample and scan its barcode. For example, confirm that the SKU from an inventory record appears in the intended field and scans correctly. This quick check can catch incorrect data, misplaced elements, or an unsuitable layout before labels are applied.
Free software may cover basic layouts, while desktop software runs on an installed computer and cloud software is accessed online. Choose based on where staff prepare labels, which devices they use, and whether the workflow requires shared access.
Software costs depend on the pricing model and included capabilities. Total setup costs also depend on hardware, such as the printer, and consumables, such as labels or ribbons. Compare subscription or licence terms with the equipment and materials required for your chosen print method.
Common errors include mismatched product data, an incorrect barcode value, and print quality that makes a code difficult to scan. Keep source records and printed fields aligned, use an appropriate template, and test a sample before a production run. Marketplace, carrier, or product-specific label instructions may also affect the required content.
Custom label design
Custom label design lets a business arrange fields to suit a product, package, or brand. A template can combine a product name, SKU, barcode, and other relevant details, with space allocated for each. Decide which information stays fixed and which values change between products or orders.
Use the editor to set field placement, text size, and barcode position, then save the layout for repeat printing. For example, a small product label may need a compact arrangement, while a shipping label prioritizes delivery information. Software focused on barcode and label design can support this template-based workflow.
For small teams, prioritize clear menus, guided setup, and reusable templates that staff don’t have to rebuild for every label. A good workflow makes each step clear: select a template, connect the relevant data, preview the layout, and print a test. Assess these steps against your printer, typical label tasks, and order volume.
Integrating label printers with POS, ERP and EDI software
Integration links order or product information to the label-printing step. A point-of-sale (POS) system may hold product details, an enterprise resource planning (ERP) system may manage inventory, and electronic data interchange (EDI) may carry transaction data between businesses. The key question is how those records reach the label template.
Map the workflow before selecting software. For example, trace one online order from Shopify through order processing to a thermal printer in the warehouse. Identify which system supplies the shipping address, product identifier, and barcode value. Then decide whether staff need to print one label or a batch.
ERP integrations and watched-folder automation
An ERP connection can transfer product or order fields into a label layout, reducing manual re-entry. Integration may use a built-in connector, a supported data exchange, or a file-based workflow. Compatibility depends on the software, system, and printer combination, so assess the entire path rather than the printer alone.
A watched folder provides a file-based option. An ERP or order process places a prepared file in a designated folder; the label software detects it and uses its data for printing. For example, a record might contain an order number, item code, and destination. Define file formats and field mappings clearly to prevent incorrect values from appearing on labels.
- POS: Identify which product fields should populate shelf, stock, or packing labels.
- ERP: Map inventory or order records to the correct label fields.
- EDI: Define how received transaction data becomes a printable record.
Test each route with a sample record before using it in the warehouse. Check that the intended data reaches the correct fields and that the selected printer receives the right job. Decide what staff should do if a record is incomplete or the printer is unavailable. A simple fallback, such as correcting the source record before reprinting, helps keep labels aligned with orders.
Shopify label printing integration
For Shopify orders, determine whether the printing workflow uses a direct connection, an export, or an intermediate order system. The route affects which fields are available and how staff start printing. For instance, a business may need the order number and shipping details on a parcel label, with product identifiers handled separately.
Match the setup to the work pattern. Someone packing individual Shopify orders may need a clear print action for each order; a warehouse processing batches may need a controlled batch workflow. In either case, test a sample order to check field mapping, label output, and printer selection before adopting the process.
To discuss a printer and software workflow for your operation, contact the team.
Spreadsheet and database connections for variable data
A spreadsheet or database connection can populate a label template with changing product and order details. Instead of typing each value, the software uses fields from a data source. For example, a product record can supply an item name, SKU, and barcode value for each label.
Start by identifying the source of truth for each field. A spreadsheet might hold product descriptions, while an order database holds shipment-specific information. Use clear field names, such as “SKU” and “OrderNumber,” then map each source column to its matching template field. Consistent names make errors easier to spot.
Before printing, review the data structure. Each row should represent the record needed for a label, such as one product or one order. Check that barcode values stay paired with the correct item and that blank cells don’t create incomplete labels. A sample batch can reveal shifted columns or unexpected characters.
- Product data: Use fields such as SKU, description, or colour.
- Order data: Populate details that change between shipments.
- Template mapping: Match each source column to its intended label field.
- Output test: Compare a printed sample with its source record.
Choose a connection method that suits your operations. A file import can work for periodic batches, while a database connection can draw current records during printing. The right approach depends on how often information changes and who maintains it. For example, a seller who updates a product spreadsheet before printing may prefer a repeatable import process.
Mobile printing adds another decision. If staff prepare labels near packing benches or shelves, a mobile device can bring the printing workflow closer to the task. Confirm that the software, device, and printer work together. The mobile screen should also make product selection and field review practical before staff send a job.
USB and Bluetooth suit different setups. USB uses a cable between a computer and printer, which can work well at a fixed packing station. Bluetooth connects compatible devices wirelessly and may support a mobile workflow. In either case, confirm that the printer model and software support the connection.
For a dependable setup, test a record from source to label. Connect the selected spreadsheet or database, map the fields, and print a sample through the intended USB or Bluetooth connection. Scan the barcode and compare its printed details with the source row. This checks data handling and printer communication before routine operations begin.
Shipping and product label sizes
Printer compatibility depends on the software’s native drivers, printer model, label dimensions, and print method. Common examples include 4x6 shipping labels, 2x1 product tags, and 1x2 Amazon product labels, but the printer and media must support the chosen format.
Start by separating shipping labels from product labels. A 4x6 layout gives shipping information a different space and purpose than a compact 2x1 tag. For Amazon product labels, 1x2 is a common format; Amazon shipping labels commonly use 4x6.
Label dimensions affect more than the template. They determine how much room is available for addresses, product details, and barcodes. Match the software’s page or stock settings to the physical roll or sheet, then preview the layout. Incorrect scaling or positioning can clip required details or make barcodes difficult to scan.
- 4x6: A recommended format for e-commerce shipping and a common Amazon shipping size.
- 2x1: A recommended size for product tags.
- 1x2: A common format for Amazon product labels.
- 2x2: An example of a different format an automatic-sensing printer may recognize.
Automatic sensing can help a printer recognize different label formats, such as 4x6 shipping labels and 2x2 thank-you stickers. That flexibility is useful when one workstation handles more than one task. Still, the label stock and printer must match the job, and the software needs an appropriate layout for each format.
Supplies also depend on the print method. Direct thermal printing uses heat-sensitive labels without ink or ribbons. Thermal transfer printing uses a ribbon, so choose compatible labels and ribbon for that setup. For example, a 4x6 shipment label and a small product tag may use different stock sizes, even when the same software prepares both layouts.
For reliable output, select software with a native printer driver for the exact printer brand and model. Set the media dimensions in the template, load matching stock, and print a sample. This confirms that the layout fits the label and the barcode is in the intended position. Available thermal label printers are one part of matching printer type to label workflow.
Compatibility isn’t determined by the software name alone. Check the combination of printer model, supported driver, label size, and supplies. A printer that supports your selected stock, paired with a compatible software driver and template, can produce the intended format. Test each label type before switching between shipping and product runs.
Choose a barcode label printer whose model has a native driver in your software, and match its template to the stock, such as 4x6 shipping labels, 2x1 product tags, or 1x2 product labels. Direct thermal printers require heat-sensitive labels, while thermal transfer printers require compatible labels and ribbon; automatic-sensing models may also recognize formats such as 2x2.
Barcode and QR code formats
Choose a barcode format based on the information it carries and the scanner that reads it. A linear barcode, such as Code 128, represents data with parallel bars. A QR code uses a two-dimensional pattern and can hold information such as a web address. The label software must support the format your workflow requires.
Start with the scanning task. A product identifier scanned at checkout has a different purpose from an internal SKU used during packing. For example, UPC-A or EAN-13 can represent retail product identifiers, while Code 128 can encode text such as an order reference. Match the format to the receiving system, not simply the label’s appearance.
QR codes suit workflows where a camera or compatible scanner reads a two-dimensional code. A business could encode a product page or an internal reference, depending on how staff use the label. Before choosing one, decide what information it should carry and which device will scan it. Keep the encoded content current and useful to its intended reader.
Templates help keep each code in a consistent position. Set the barcode field to draw from the correct product or order value, then keep its size and placement consistent across the label. Avoid manually replacing values in a template. For example, an order-specific code should draw from that order’s record, not a fixed sample value.
Check these points before a print run:
- Format: Select the code type accepted by the system that scans it.
- Data source: Map the code to the intended SKU, order reference, or URL.
- Layout: Reserve clear space for the code on the label template.
- Output: Print a sample and scan it using the intended device.
A successful preview doesn’t prove that a printed code scans correctly. Test the physical output with the scanner or device used in the workflow. Confirm that the scan returns the expected value, such as the correct SKU for a product. If it returns a different record, review the data mapping before printing more labels.
Keep the code readable in its final context. A small product label has less room than a shipping label, so layout and surrounding text affect placement. Avoid stretching or crowding the code when adjusting a template. Instead, select a suitable code size and position, then print and scan another sample.
For barcode software that supports label creation and printing, contact the team about your barcode workflow.
OptiMediaLabs Canada: Labelview software
OptiMediaLabs Canada offers Labelview software as a barcode software option for small businesses assessing their label workflow. It may be a natural next step when you’ve identified the printer, label formats, data sources, and barcode requirements your operation needs to support.
Use those requirements to guide the discussion. For example, outline whether labels draw from order or product data, which printer models are involved, and whether your workflow includes shipping labels, product labels, or both. This gives you a practical basis for considering Labelview software alongside your printing setup. OptiMediaLabs Canada also offers Afinia Color Label Printers, RFID Label Printers, and Afinia Label Cutters & Finishers for businesses evaluating related equipment.
Contact OptiMediaLabs Canada to discuss Labelview software for your barcode labelling workflow.
Make your next label workflow decision
Define what the software must support as your business grows. Consider who prepares labels, where printing happens, and how the workflow may change as products or order processes evolve. A clear operational brief helps you assess whether e-commerce barcode label printing software fits your needs, rather than choosing based on features alone.
OptiMediaLabs Canada offers Afinia Colour Label Printers, specialty ink cartridges, and RFID Label Printers alongside barcode software. These offerings can be relevant when reviewing the software, printer, and supply components of a labelling setup. The right combination depends on your application and the workflow you need to support.
Bring your requirements forward: describe the labels you produce, the information they carry, and how staff print them. Contact OptiMediaLabs Canada to discuss your needs and explore a suitable next step for your labelling workflow.
Frequently Asked Questions
What barcode label printing software works with Shopify, WooCommerce, and other e-commerce platforms?
Software works with Shopify, WooCommerce, or another platform when it can receive the order or product data needed for labels. Check whether the workflow uses a built-in connector, an export, or another supported data route. OptiMediaLabs Canada offers BarTender, NiceLabel, Loftware, and Labelview software. For an e-commerce barcode label printing software setup, assess the platform connection and printer compatibility together, then test a sample order before adopting the workflow.
Which barcode types are used for e-commerce products and shipping labels (UPC, EAN, Code 128, QR)?
UPC and EAN formats are commonly used for retail product identification, while Code 128 can encode alphanumeric references, such as an order or internal item code. QR codes can carry information that a camera or compatible scanner reads, such as a web address. Choose according to the receiving system’s requirements. For example, a product identifier and a parcel-routing reference serve different purposes, even if both appear as scannable codes.
How do you create and print product barcode labels for an online store?
Create product labels by preparing an accurate product record, placing its identifier in a suitable template, and producing a test print. For example, connect a SKU list, map the SKU field to the barcode, and include a human-readable product name if the layout requires one. Scan the test label and compare the returned value with the product record. Once the output is correct, use the same approved template for the relevant product batch.
How does barcode label software integrate with inventory management, order fulfilment, and shipping systems?
Label software integrates by receiving data from inventory, order, or shipping systems and assigning selected fields to a label layout. A system might pass an item identifier to an inventory label, then provide an order reference for fulfilment. Connections may use an available software integration or structured data files. The key is preserving the relationship between each record and its label. Test a sample from each workflow to catch mismatched data before routine printing.