
How to Generate Carrier Compliant Labels from a Shipment List
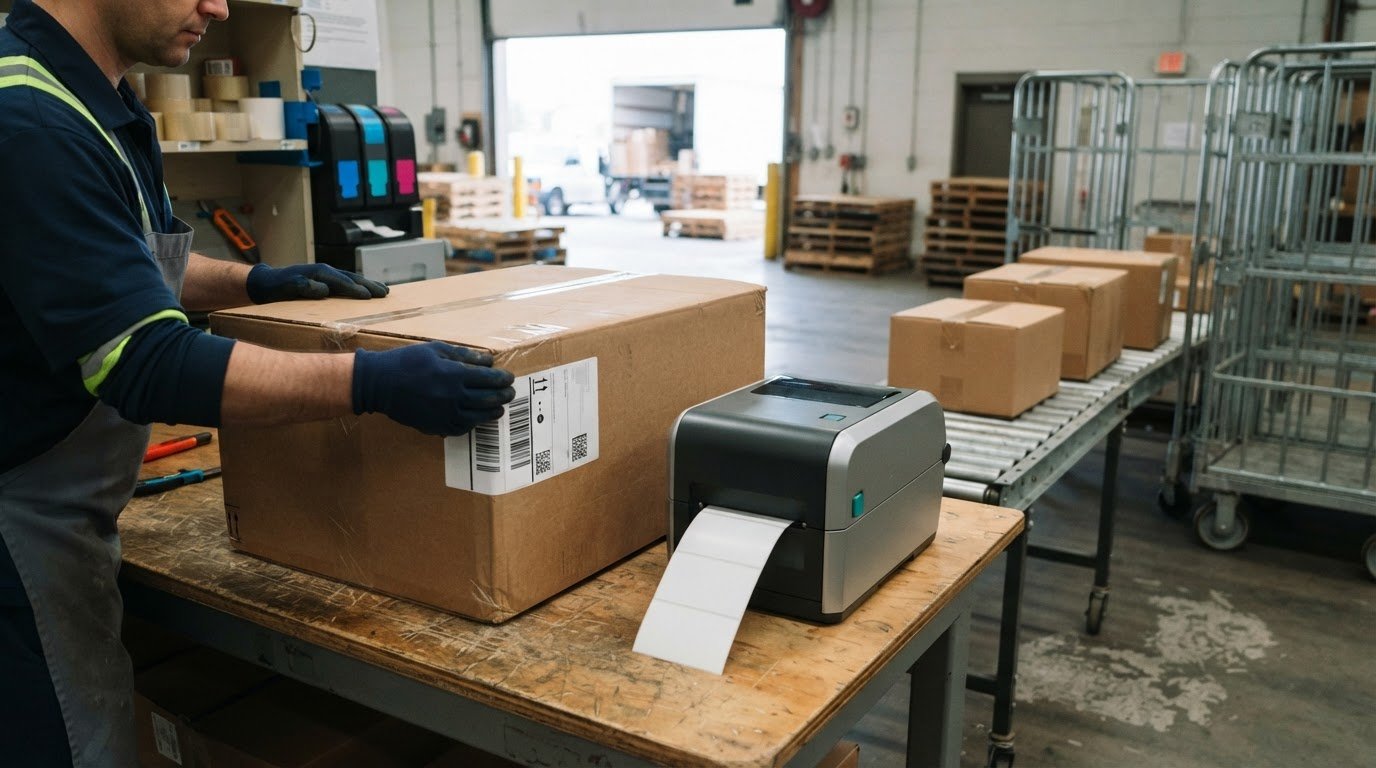
A shipment list can do more than track orders: it can drive label production. Automating shipping label creation from an order database lets you populate a label template with order details and trigger printing as shipments are processed. The key is mapping the required carrier and recipient information to the correct fields and formats.
Creating labels manually takes staff time, especially when someone has to re-enter information already stored in an order system. Repeated entry also increases the risk of mismatched addresses, missing fields, or labels assigned to the wrong parcel. Automation can reduce these steps, but it still relies on accurate order data and a workflow that handles each shipment correctly.
This guide explains how to generate carrier-compliant labels from a shipment list or dataset, connect order data to a reusable template, and build checks into printing and processing. It also shows where manual workflows consume time and create avoidable friction, helping you assess which steps are worth automating for your Canadian shipping operation.
Key Takeaways
- Use shipment data to populate a reusable label template, then trigger printing when an order reaches the right workflow stage.
- Track printed labels by shipment or batch so staff can identify completed work and reprint only what’s needed.
- Map sender and recipient details, routing information, tracking numbers, barcodes and carrier-required fields to the appropriate label fields.
- Reduce manual re-entry by connecting label generation to the order data your operation already uses.
- Explore how Labelview software can support barcode and label workflows when you’re ready to streamline production.
Can shipping label creation be automated?
Yes. A workflow can generate labels from order data, send them to a selected printer, and record completed output. Restrict access to customer addresses and shipment details. Incorrect data or duplicate triggers can also create mislabelled parcels or unintended label purchases.
- Set a clear trigger and review point. Start label generation when an order reaches a defined status, a routing decision is made, or a batch is ready. A return authorization can trigger a return label. Before printing begins, show users the shipment list and selected printer. After printing, confirm the run’s outcome. These checkpoints help catch an incomplete address or incorrect shipment before labels are applied.
- Track each printed label. Store a print status or identifier against the shipment record. A print identifier lets staff confirm which labels were produced, rather than treating every listed order as complete. Record the label’s shipment reference and whether printing succeeded. If one label fails, reprint that individual label; if a batch fails, reprint that batch. Avoid restarting the full process, which can create duplicate labels for shipments already completed.
- Route output to the correct destination. Select the printer by its configured name or location before sending a job. Don’t rely only on the operator’s default printer, especially when packing stations use different devices. A thermal label template may use a 4-by-6-inch page size. After generation, the workflow can send the label to a thermal printer, attach it to the order record, email it, or return it to a warehouse management system (WMS) or transportation management system (TMS). Choose the destination that fits the next handling step.
- Process bulk jobs in controlled batches. Retrieve a defined shipment list, generate its labels, print them, then record processing status. Use an individual shipment identifier to match each output to its order. For larger batches, preview the count and destination before printing. If the printer stops midway, compare the recorded print identifiers with the batch list. Then reprint only unprocessed labels. Keep customer information limited to the systems and staff needed for fulfilment, and log exceptions such as missing data, failed output, or duplicate requests.
Automation does not have to replace existing systems or workflows. You can introduce shipping-label generation alongside them, with a trigger such as an order-status update, routing decision, carrier-selection rule, batch-processing event, or return merchandise authorization. The process can request confirmation before printing and again after it finishes, making both the start and the result explicit parts of the workflow.
Specify the printer for each job instead of relying only on a user’s default setting. The workflow should also let users reprint an individual label or a particular batch without restarting the whole process. These controls make printer selection and recovery part of the workflow: users can confirm the intended printer, review completion, and choose what to reprint. Automation can cover label creation and printing while preserving existing systems, with user decisions at key points and a way to repeat only the required output.
Automating label generation from a shipment list or dataset
Connect shipment records to a reusable label template, then route each generated file into the fulfilment workflow. The right method depends on your database, carrier connections, and the level of control your process needs.
Compare automation tools with custom integration
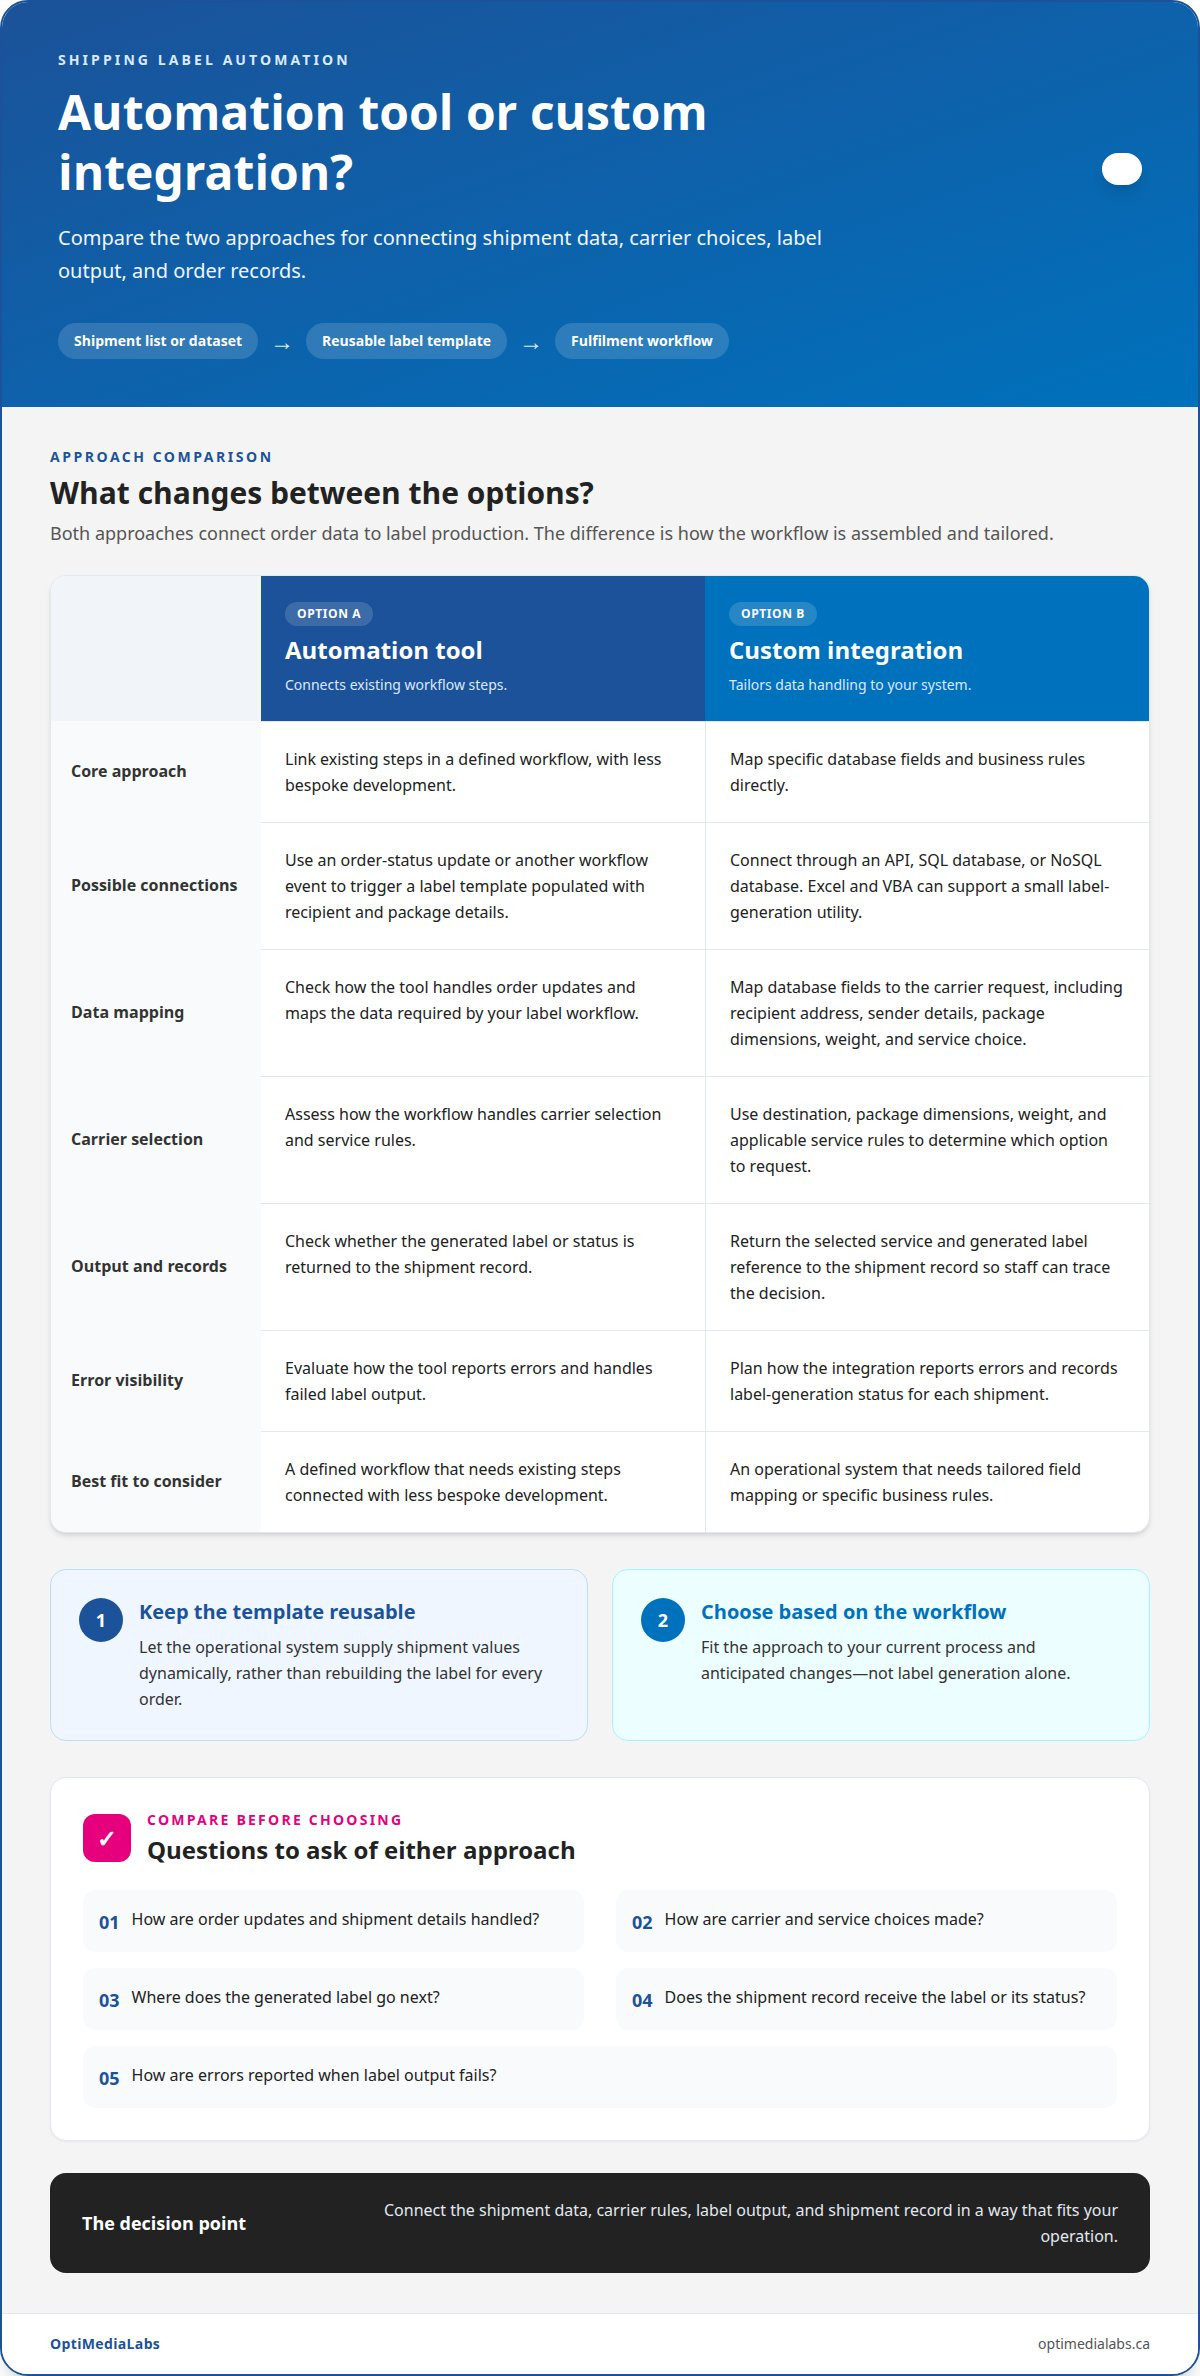
Choose an automation tool for a defined workflow, or plan a custom integration if your operational system needs tailored data handling. A tool can connect existing steps with less bespoke development; a custom system can map specific database fields and business rules directly. Compare how each handles order updates, carrier selection, label output, and error reporting. Do not judge a system by label generation alone: it should also return the label or status to the shipment record.
For example, an order-status update can trigger a label template populated with the recipient and package details. A custom integration can connect through an API, SQL database, or NoSQL database. Excel and VBA can also support a small label-generation utility. Choose an approach that fits your current workflow and anticipated changes.
Connect the order database to a carrier API
Map database fields to the carrier API’s shipment request. Connect the recipient address, sender details, package dimensions, weight, and service choice to the corresponding fields. Keep the template reusable, with the operational system supplying shipment values dynamically. Then configure the workflow to send the request when its selected trigger fires, such as an order reaching ready-to-ship status.
Make rate and service selection data-driven. Use the shipment’s destination, package dimensions, weight, and applicable service rules to determine which option to request. Compare rates using consistent package and destination inputs, rather than choosing a service based on weight alone. Return the selected service and generated label reference to the shipment record so staff can trace the decision.
Generate, print, and track labels
Build a controlled sequence from shipment retrieval through label confirmation. A database workflow can use 3 tables, for example, orders, shipment details, and generated label records. Linked fields can supply related order information, but multi-value links may return only the first related record unless the workflow uses a loop or iterator. Configure the process to move through every shipment in the list.
- Retrieve eligible shipments and assemble the required fields.
- Generate each label from the reusable template, including data from linked records.
- Print to the designated printer or save the PDF to the order’s attachment field.
- Record each result and stop when every shipment has been processed.
Use the saved label record to connect the output with its order. A failed item can then be handled without regenerating completed labels. For help planning label workflows and printing equipment, contact OptiMediaLabs Canada.
Carrier-compliant labels and barcodes
For shipments within Canada, validate address and postal-code fields through the selected carrier’s validation process. Keep the original order details available, and route rejected or incomplete addresses for correction before generating the label.
- Map each carrier-required field. Identify the sender and recipient addresses, routing codes, tracking number, barcode, and operational references needed by the chosen carrier. Map each value to its own template field. For example, keep a shipment reference separate from the recipient’s address. This makes missing data easier to identify and reduces errors caused by putting information in the wrong place.
- Validate Canadian address data before creating the label. Send the complete destination fields through the carrier’s address-validation process. Use its response to identify an incomplete or unrecognized address, then hold that shipment for correction instead of silently replacing details. Keep postal code data in a dedicated field. Don’t infer missing characters or merge it into the street-address field.
- Use the carrier’s label format and required content. Configure a template for the selected carrier and service, then populate it with the shipment’s actual data. Include carrier-required fields and routing information in their intended positions. Avoid reusing a template across services without checking its field mapping. An incomplete routing code or tracking field can make the label harder to process.
- Keep barcode content and presentation consistent. Generate the barcode from the correct shipment identifier, and keep its associated text linked to the same order. A licence plate barcode label may be approximately 2 inches wide by 1 inch long. Treat that as an example, not a universal specification. Use the dimensions and placement required by the applicable carrier format.
- Test scanning and printed output. Print a sample label and check that its text is legible, its barcode is complete, and no required field is clipped. Inconsistent label formats can affect scanner performance and slow internal handling. Test the actual output from the production template, not just a screen preview. Confirm that a scan resolves to the intended shipment record.
- Manage exceptions without altering completed shipments. Store validation failures with the affected order, then correct the source data before generating a replacement label. Keep the accepted address and final label associated with the same shipment record. If staff change a recipient detail, preserve a clear record of that change. This helps prevent a corrected label from being matched with an earlier shipment version.
Carrier compliance depends on accurate shipment data, the selected service’s required fields, and a readable label layout. Build checks for each into the template and validation workflow before processing a full shipment list.
Costs and inefficiencies of manual label creation
For Canada Post, UPS, FedEx, and Purolator, API access and label charges depend on carrier terms and shipment details, including service, destination, weight, and dimensions. Track those charges separately from staff time, rework, and integration costs to assess the full workflow.
- Measure the time spent re-entering shipment data. Manual label creation often requires staff to copy recipient and package details already stored in company databases. Record the steps for one order, from opening its record to producing a usable label. Include corrections and repeated entry. This gives your operation a practical baseline without assuming that every shipment takes the same effort.
- Calculate the workload across a shift. For example, shipping 3,000 parcels during one eight-hour shift equals 375 parcels per hour, or 6.25 parcels per minute. That throughput includes the whole operation, not just label entry. Identify when staff must pause packing to prepare labels, resolve missing details, or match paperwork with parcels. Those interruptions can constrain the flow even when printing itself is quick.
- Identify where product variety creates matching errors. Operations handling 100-1,000 different products or SKUs at once face added complexity when matching labels to cartons. A manual process can require staff to reconcile each parcel with the correct order, product, destination, and shipping service. Map where those details are checked. A mismatch can lead to relabelling, extra handling, or a parcel being held for correction.
- Separate carrier charges from internal labour. Log the label charge and any applicable API-related charges against the shipment, then compare them with time spent preparing and correcting labels. Canada Post, UPS, FedEx, and Purolator costs can depend on account terms and shipment characteristics. Use consistent package weights, dimensions, destinations, and service choices when reviewing shipments. This makes differences easier to interpret.
- Prioritize manual steps that repeat across orders. List tasks such as copying addresses, selecting services, formatting labels, and filing shipment records. Note which tasks recur for each parcel and which occur only during exceptions. Repeated data entry is a clear process cost; exception handling still needs a defined route. This breakdown helps determine whether automation should address all shipments or only high-volume, repetitive batches.
Before changing the process, compare recorded labour, rework, and carrier charges. Distinguish recurring manual effort from shipment-specific costs instead of treating every label as an identical expense.
Fees and label costs vary with carrier terms and shipment details, including service, destination, weight, and dimensions. Track applicable charges separately for each shipment.
Which shipping label APIs and platforms support Canadian carriers?
Carrier support depends on the specific API connection or shipping platform. For Canada Post, UPS, FedEx, and Purolator, assess each carrier connection against your shipment workflow before choosing an integration. Compare capabilities without assuming one platform supports every carrier or service.
- List the carriers and services your operation needs. Start with Canada Post, UPS, FedEx, and Purolator, then note the services used for domestic and international shipments. Separate regular parcels from returns or other shipment types. A platform’s carrier list matters only if it covers the carriers and services your orders actually require. Record which shipment scenarios the integration must handle, such as creating labels or returning tracking details.
- Compare direct APIs with a multi-carrier platform. A direct carrier API connects your order system to one carrier’s shipping functions. A multi-carrier platform can provide a common workflow for more than one carrier, depending on its integrations. Compare the data each option accepts and returns. For example, confirm that the workflow can provide package weight, dimensions, destination, selected service, label output, and tracking reference.
- Map the platform’s fields to your Canadian order records. Match recipient and sender addresses, postal codes, package details, and shipment references to the integration’s required inputs. Keep the carrier service as a distinct field, rather than embedding it in free-form notes. Check how the integration handles incomplete addresses, unsupported services, and rejected requests. A clear error response lets staff correct the specific record instead of rebuilding an entire shipment batch.
- Test the full shipment cycle for each carrier. Use a sample order to follow the request from the database through rate or service selection and label generation. Confirm that the returned label links to the correct order and that tracking information flows back into the same record. Repeat the test for Canada Post, UPS, FedEx, and Purolator individually. A successful test with one carrier does not establish that another carrier’s fields behave identically.
- Compare operating fit, not carrier count alone. Review how the integration handles batch processing, label storage, reprints, and failed requests. Consider who maintains field mappings when your order data or carrier workflow changes. A platform with several carrier connections may simplify routing, while a direct API may better fit a tightly controlled workflow. Choose based on required functions, data flow, and exception handling.
Map your carrier requirements before connecting an order system. Discuss your label workflow with OptiMediaLabs Canada as you plan the printing side of the process.
while a direct API may suit a narrower workflow. Compare carrier rates across package weights and dimensions, including for a 17-ounce parcel when assessing which carrier may offer the best shipping service. Domestic shipping zones range from zone 1 to zone 9, so check how each option performs across the destinations your orders serve.
OptiMediaLabs Canada: Labelview software
OptiMediaLabs Canada offers Labelview software for businesses building barcode and label workflows around shipment data. Consider it when your process needs label software alongside automated order handling, or when you’re selecting equipment for label production. The right setup depends on how shipment records, templates, and print jobs fit into your existing process.
For printing, available options include Afinia Color Label Printers and RFID Label Printers. Afinia Label Cutters & Finishers can also be part of a label-production setup. These products support printing and finishing; they do not replace the carrier connection or order-database logic needed to generate shipping labels automatically.
To discuss Labelview software and the equipment that fits your label workflow, contact OptiMediaLabs Canada.
Build a label workflow that can grow with your operation
Make the next step a focused review of how shipment data moves from order entry to dispatch. Identify who owns each handoff, where exceptions go, and how staff recognize a completed label. Automating shipping label creation from an order database works best when it fits how orders are actually packed, not just how records are stored.
Start with a representative shipment flow and document its decisions. Trace how order data reaches the label template, how printing starts, and how staff handle a rejected or changed shipment. This gives your team a practical basis for refining the workflow before extending it to more order types or carrier services. A plan for automating shipping label creation from an order database can then evolve alongside your fulfilment process.
When you’re ready to discuss the printing and labelling components, plan your next label workflow with OptiMediaLabs Canada. A clear process is a solid foundation for dependable fulfilment.
Frequently Asked Questions
How can shipping labels be generated automatically from an order database?
Connect eligible order records to a label-generation workflow that creates a carrier request from each shipment’s data. For example, a ready-to-ship order can start label production, while a return authorization can trigger a return label. Use a unique shipment reference to associate each result with its order. The workflow can then store the label file and returned tracking details for later fulfilment tasks.
What order database fields are required to create a shipping label?
At minimum, provide the sender and recipient addresses, package weight and dimensions, and selected carrier service. Include an order or shipment reference to link the label to the correct record. The carrier’s response can provide details such as the tracking number and label file. Keep product-line and other linked-record data separate, and include it only when the selected document or workflow requires it.